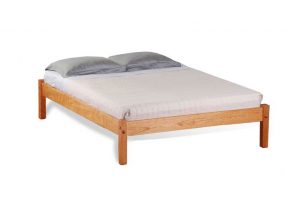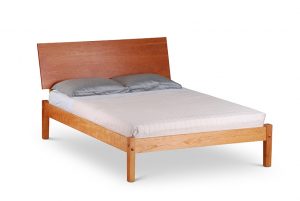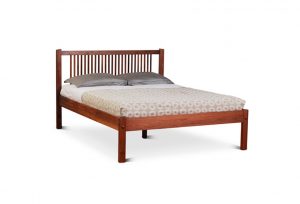
Platform Bed Frame Assembly
Parts
2 – head / foot rails
2 – side rails
4 – posts
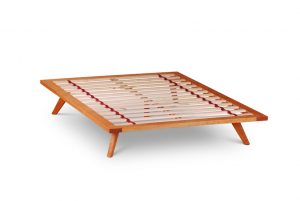
1 – roll of bed slats
1- center strut and (2) 5/16 x 1 ½” machine screws
1 -center leg with barrel nut, Allen head bolt and Allen wrench
8 – 6″ bolts, lock washers, flat washer and square nuts
8 – bolt covers
Procedure
Start by assembling the headboard and footboard
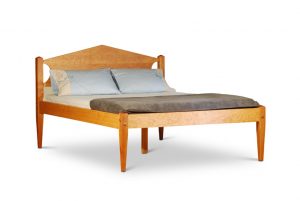
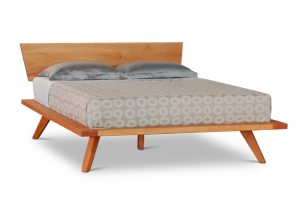
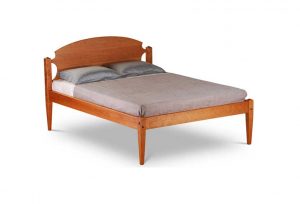
Identify the head / foot rails measuring 60″ long.(54″ – full, 38″ – twin) On some bed models this rails has counter bores on the inside for attaching a headboard.
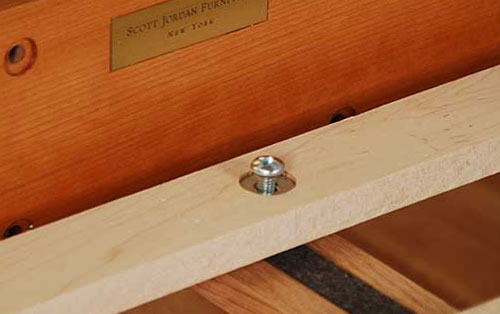
Each rail is attached to the post using a 6″ bolt with a washer, lock washer and nut.
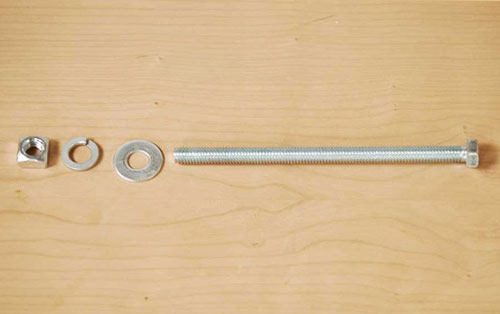
Bed bolt and fasteners
The first step is attach a post to the head rail. Insert the bolt into the upper counter-bore of a headboard post, adding, in order, a flat washer, lock washer and square nut. Thread the square nut onto the end of the bolt a few turns.
Slip the bolt/washer/lock washer / nut assembly into the channel on the mating head rail.
Make sure that the bolt channel is closer to the top of the rail and that the bolt goes through the higher of the holes in the post. The mortise for the side rail faces forward.
Using the 9/16 socket wrench (supplied) and a 5/8″ open end wrench (not supplied) tighten the bolt securely. The rigidity of the frame depends on the bolts being tighten with vigor. Do not fear over tightening.
Repeat this procedure to attach opposite side head-post, completing the headboard assembly
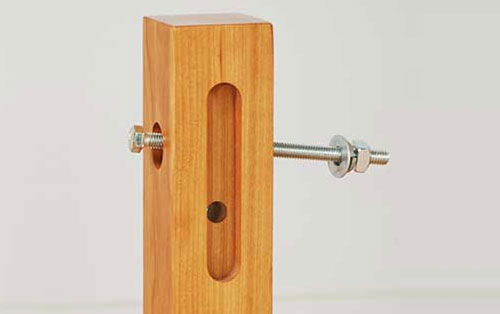
Bed post with bolts
Headrail assembly

Tighten bed bolts
Following this same technique, assemble the footboard assembly, Again, make sure that the bolt is inserted into the upper holes in the posts. The headboard and footboard assemblies are the same except that the headboard side may have holes for mounting a headboard.Stand up the headboard assembly with a side rail positioned perpendicular below the mortise for the rail.
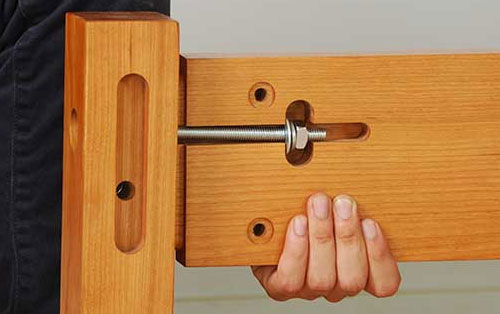
Insert the bolt into the post, add the flat washer, lock washer and thread on the nut a few turns. Tilt the assembly forward a bit and slip the bolt/washer/nut into the channel in the side rail. Tighten bolt as before with wrenches
Attach side rail to post
Tighten side rail bolts
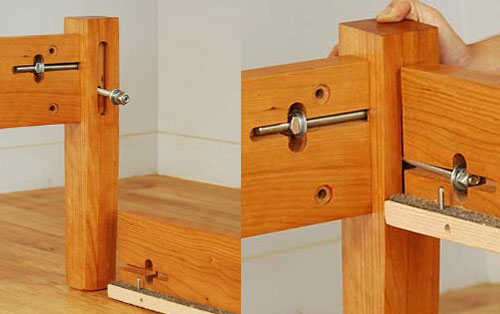
Insert bolt/wash/nut sequence into the remaining holes in the posts, threading on the nuts a few turns.
Position the bed approximately in the desired position but a short distance from any wall behind the headboard to allow for tightening of the bolts.
Lift the side rail and slip the footboard bolts sequence into the channel in the side rail. Repeat procedure for other side rail. Tighten all bolts snugly using two wrenches.
Lacking a 5/8″ open end wrench one may use a screwdriver to prevent the nut from turning when the bolt is being tightened.
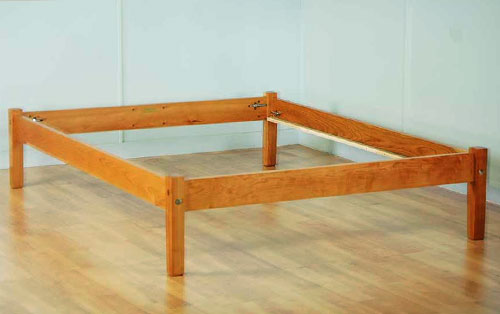
Bed frame
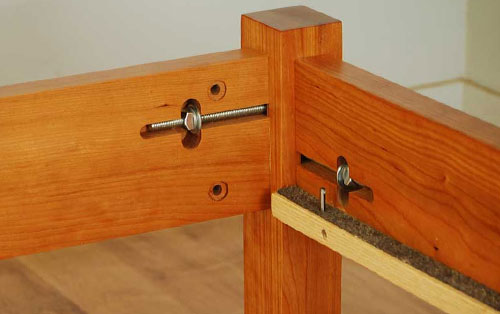
Bed rail corner detail
You should not have the four rails attached to the four posts. Tighten the bolts snugly. The structure should feel rigid. If at a later point the bed seems to wobble, retighten the bolts snugly. The bolts cannot be over-tighten using hand wrenches.
Please also remember that the hardware used is readily available from a well stocked hardware chain such as ACE in the case that it becomes lost in moving.
Place the set of slats on the side rail ledger strips. The counter-bores with the washers inserted should face up. Position one of the end slats (the end slats have the steel washers) behind the pins on the side rails. Stretch out the slat array so that the end slats are held in place behind the steel pins.
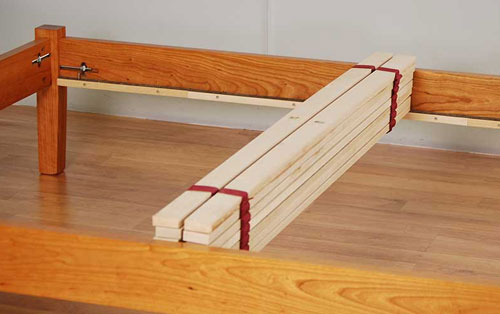
Bed slats on frame
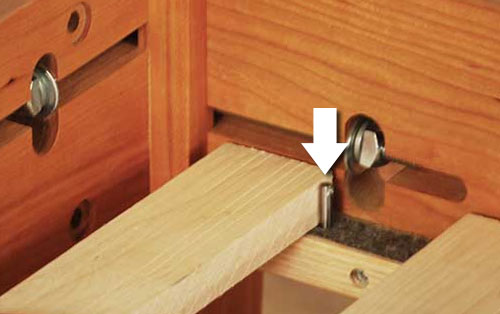
Bed slat behind pin
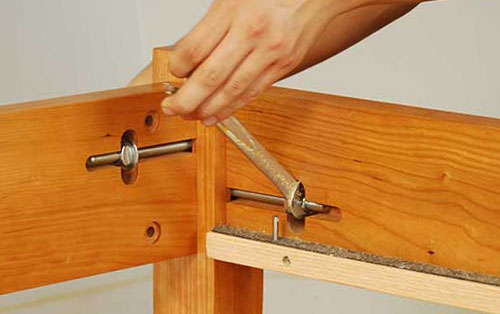
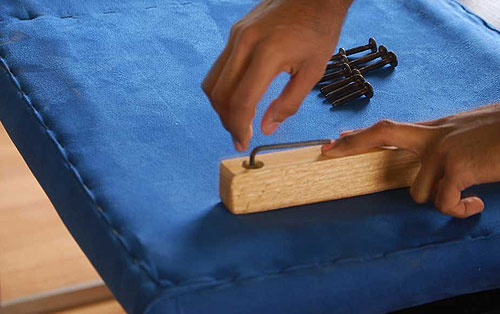
Next attach the center leg to the center strut by inserting the hex head bolt through the strut (felted side up) into the hole in the top of the leg. The bolt should catch the barrel nut inside the leg. Tighten with the Allen key (supplied).
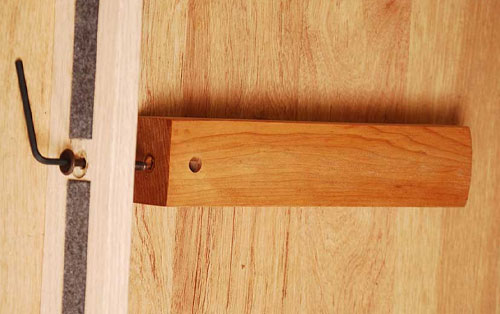
Assembly center leg and strut
Center strut assembly
Position the center leg/strut assembly perpendicularly under the slat array. connect the center strut to the end slats with the 5/16″ machine screws inserted into the T-nut in the center strut.. Tighten securely with a #3 Phillips screwdriver. There is an adjustment foot under the center leg to accommodate uneven floors.
Add the bolt covers. Moistening the o-ring makes it a bit easier to insert. It might be necessary to tap the covers with a rubber mallet to set them in the counter-bore.
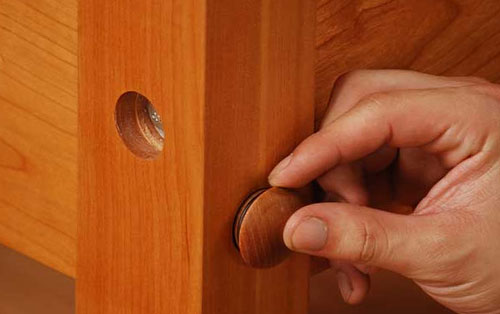
Attach bolt covers
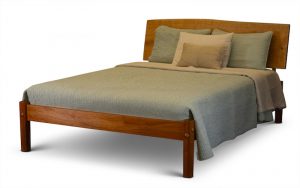
Assembling the Headboard
Parts
1 – headboard
4 – bent support brackets
6 – hex head assembly screws
8 – hex head assembly screws with hex nut
Procedure
Attach the bent brackets to the headboard with the hex bolts. Three bolts attach each bracket.
Attaching brackets to headboard
Tighten bolts partially so that there is a bit of play.
Insert hex bolts into the lower portion of the two center brackets first. Insert the hex nuts into the inside of the head rails. Insert the hex bolts on the brackets into the back of the head rail and connect to the hex nuts and partially tighten. Add the bolts to the outer two brackets and bolt together similarly.
Initially leaving a bit of play in the bolts makes it easier to align the bolts and nuts. When all all bolts are secured to their mating fasteners tighten completely. Do not over-tighten the bolts that connect the bracket to the headboard.